Rose's was filled with furnishings rejected by clients; ours was overrun with a variety of non-integrated projects and wispy flyaways that failed to "work" elsewhere. Harmless enough, until, at some point, a line was crossed. What was once a halfway house for homeless decor morphed into a life-sucking vortex that took victim many an unwitting decorative element. An overhaul was utterly necessary.
 We attacked the space with great zeal. So great, in fact, that we only realized after the fact that there wasn't a single "before" shot to be had. Such is life. Perhaps, I justified after the fact, it's better this way, for the sake of preserving an aura of mystery. But no, I'm certain it would have been better had you seen the truly pedestrian junkiness of the space beforehand.
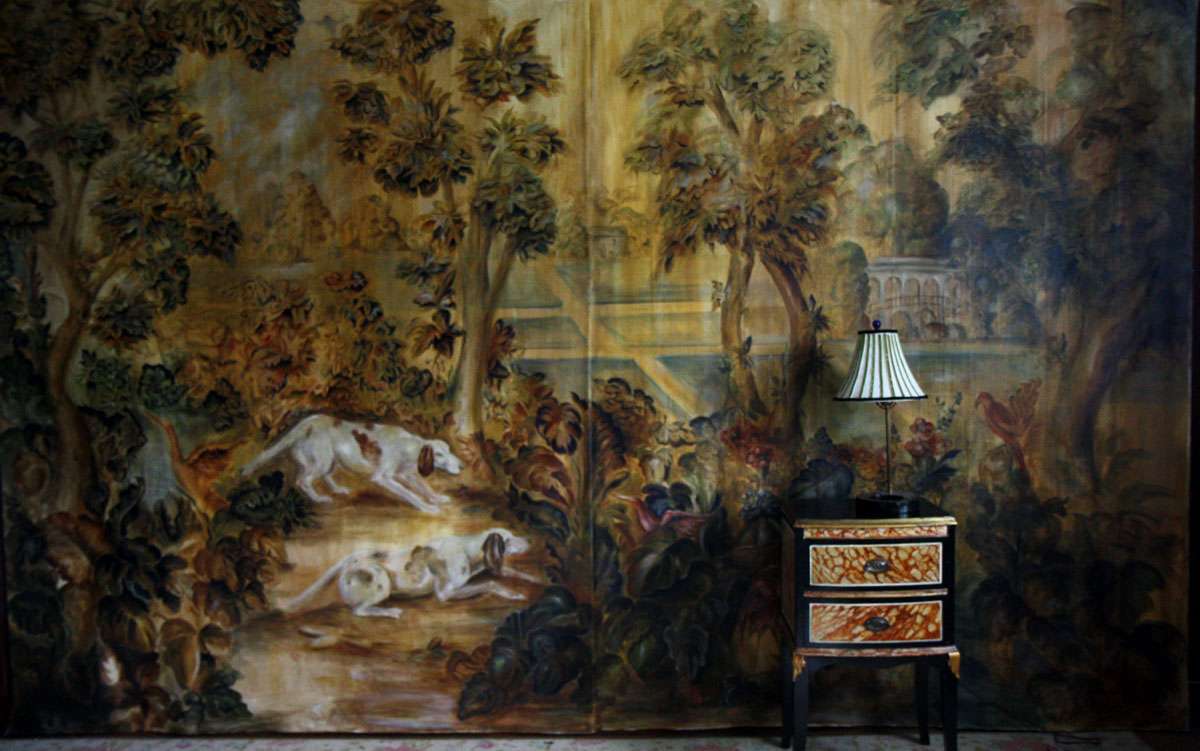
In shelter mags, some decorating maxims seem to pop up ad nauseum. One that has always perplexed me is the "build a room around a carpet" philosophy. Sure, that helps with cohesion, but why a carpet? Much more wall shows than floor, and seeing as I'm not acquainted with any carpet weavers, a painted wall hanging allows us much greater control over the general atmosphere of a space. So, we decided to tie the entire room together with a dirty, dank, aged (looking) tapestry-inspired hunting scene.
I should let you know, I have my own decorating mantras. First and foremost: Nothing pulls a room together like grit, grime, and gilding. At three canvas panels wide, my mom painted this "tapestry" to knock out the entire (previously dark wood paneled) wall. My other favorite oft-repeated mantra? Go big or go home.
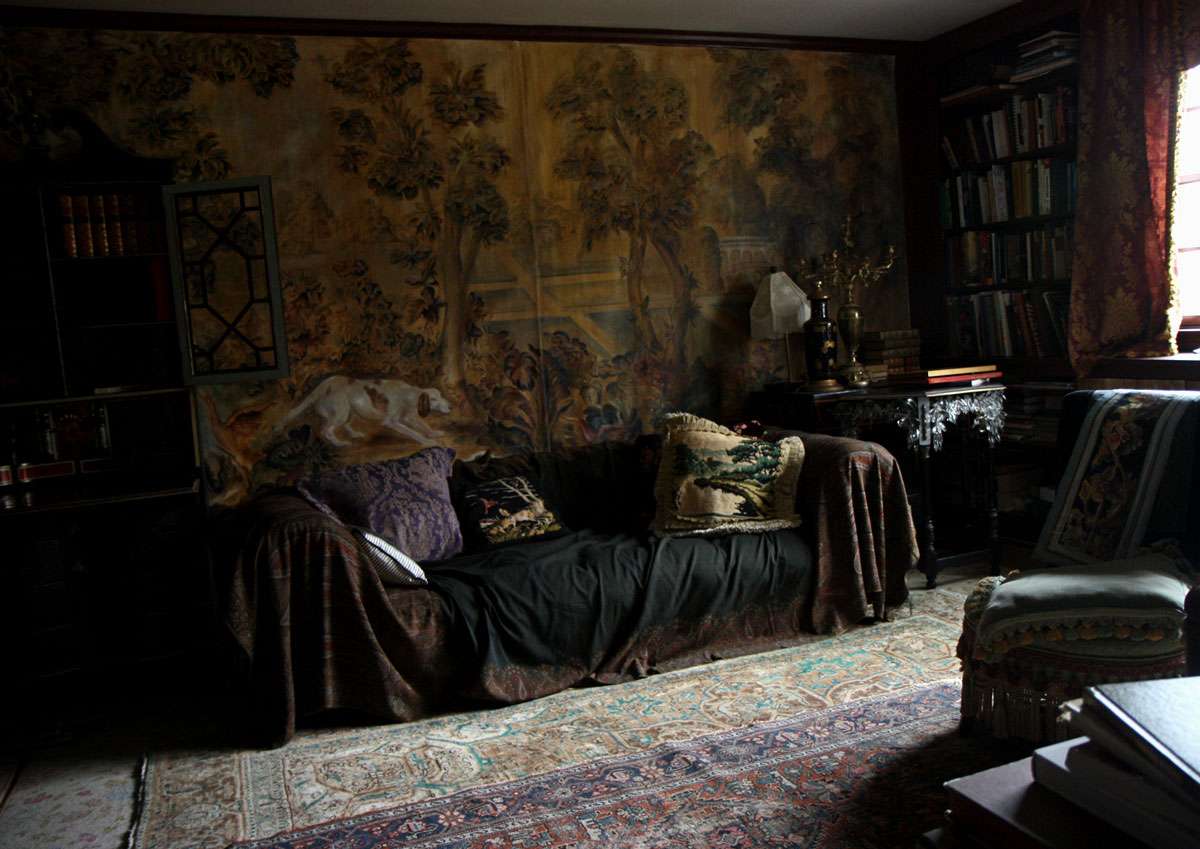
Big? Yes. Extravagant? Always. But, we really pulled together this studio space with spit and glue. In fact, there is not a single new piece of anything in this room, at all.
Trick #1: Layering carpets. Behold the floral carpet that I've LOATHED for years, deeply buried (oh, thank the lord) under an Oriental carpet found extremely inexpensively on eBay. The catch? A large part must have been damaged, because the thing arrived surgically stitched together, and well, the pattern doesn't exactly match up. But hey, when you're layering, these things are minor details.
Trick #2: Covering the plastic sofa. Oh my, I cannot believe I just admitted that under this lovely wool blanket, exists a brown, PLASTIC beast of a Chesterfield sofa in a rather ideal shape and size.
Trick #3: Using old fabric remnants. Make pillows from them. You don't want your guests to see the plastic sofa, and you don't want them to feel it, either. Actually, the curtains are old panels as well, and the lampshade is embellished with remnant ribbon.

Trick #4: Covering the paneling with canvas. We even went so far as to cover the cabinets with stenciled gold/ black damask (and ended up liking it so much, we made another panel of the damask for the wall). It's very easy to attach with cornstarch/water paste, and doesn't do permanent damage, so foreseeably, you could change your rooms daily if you felt so inclined.

Trick #5: Working with old pieces of furniture. Recognize the stalactite table and the velvet secretary? All of these pieces were thrift-store finds, reworked or painted, down to the faux-marble accent table.